How To Configure Your Yubikey for Maximum Usefulness & Security
For many months I’ve been using a Yubikey as a staple of my cyber security plan. It makes me exponentially more secure and at the same time makes it easier for me to stay secure. The only part of it that isn’t drop-dead simple is the configuration, though even that isn’t very difficult. I’m going to show you step by step how to configure your Yubikey to get the most out of it and set yourself up for success.
In order to configure your Yubikey, you’re going to need the personalization software. This utility is available for Windows, Intel-based Mac OS X and Linux so you’re good to go no matter what you use. Once you download it, follow the instructions to install or run it on your machine. For this example we’ll be using the Windows version of the utility, running on Windows Vista.
You’ll see areas of the screenshots that are blurred, where there is information that is personally identifiable and possibly still valid. Anywhere you see information in plain text, that information is invalid so there is no risk in sharing it.
Once you have it installed, run the software. You will be greeted with a screen like this.
Note: if you’re using a newer version of the software, your interface may differ. At the time of this writing, the latest version is 3.0.1.
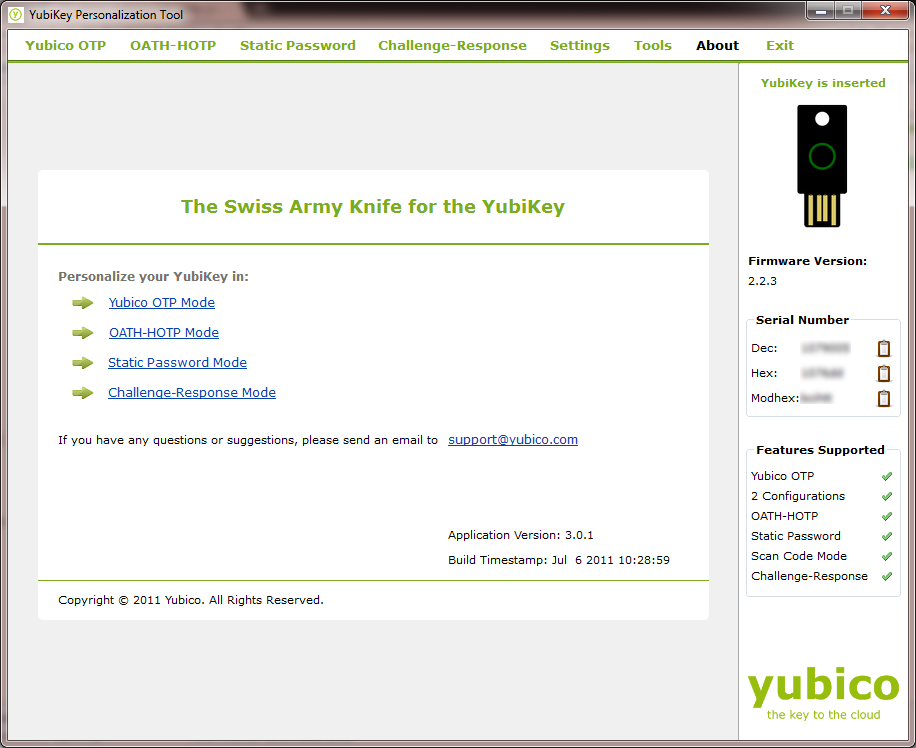
This is the main screen, which gives you an overview of your Yubikey and the options for configuring it.
Yubikey offers two memory slots, meaning you can have two different configurations stored in the device. For this example we’re going to have the following setup:
- Memory 1: Yubico-authenticated One Time Password (this is used with services like LastPass)
- Memory 2: Static Yubikey password (traditional password - always the same)
This is going to give us the most use from our Yubikey, since you can use the static password anywhere One Time Password isn’t supported (logging into Windows, securing a TrueCrypt volume, etc.).
One Time Password
Let’s get started with Memory 1, the One Time Password configuration. On the main screen, click “Yubico OTP Mode” to get started.
On the next page, click the “Quick” button.

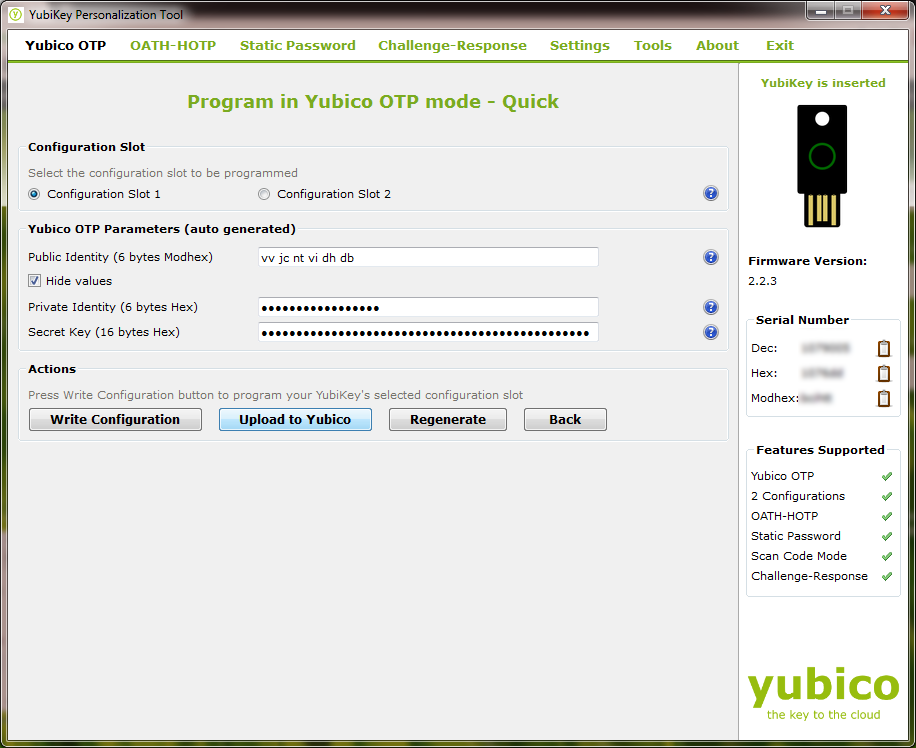
This greatly simplifies setting up the Yubikey, and handles all the configuration options required for the One Time Password system. It also allows you to upload your Yubikey’s credentials directly to the Yubico servers, which is required for using the Yubikey to authenticate with services like LastPass. The Quick configuration screen looks like this:
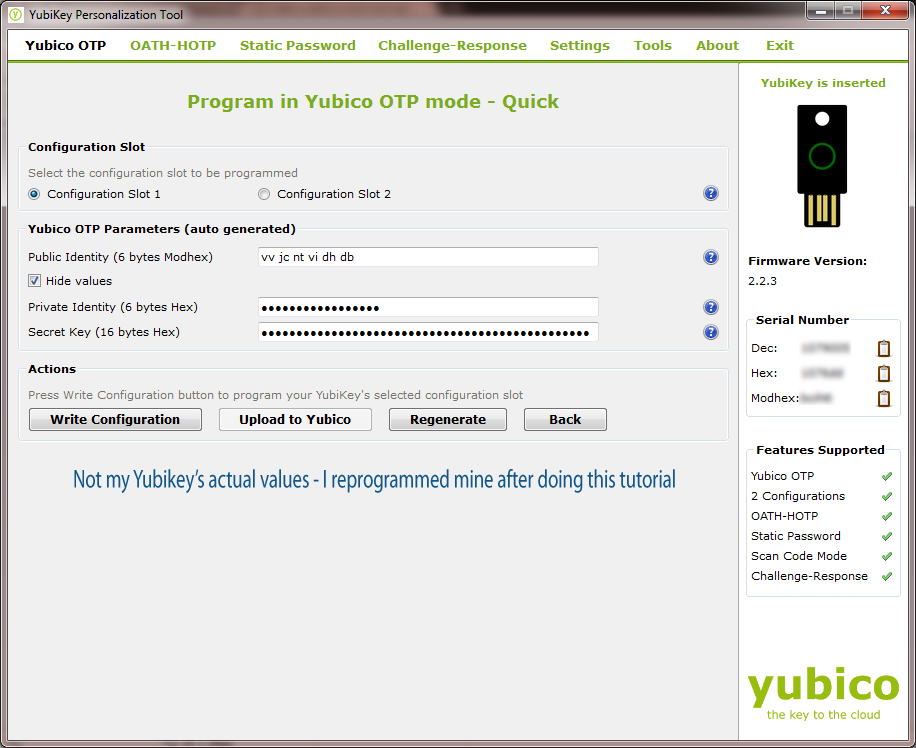
Everything you need for OTP to be configured is shown, and all the values are randomly generated and pre-filled by the software. All you have to do is choose the memory slot you want to use, which for this example (and I’d recommend for your use as well) will be Configuration Slot 1. Once your screen looks the the image above, click “Write Configuration” and click yes at the prompt.
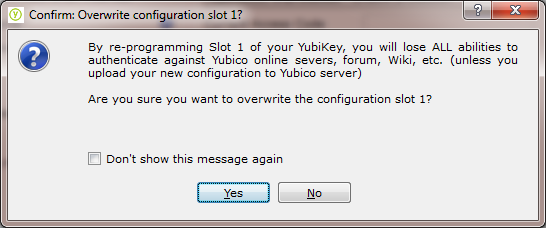
The software will now write the values we’ve just generated to the first memory slot in your Yubikey. When it’s successfully written the information, your screen will look like this:
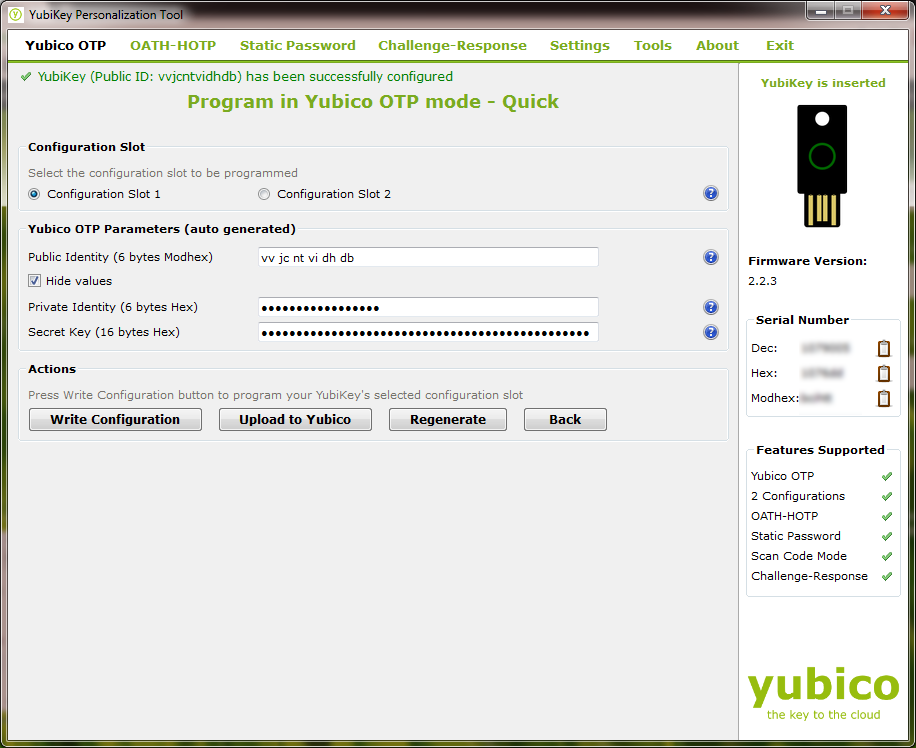
Now that we’ve programmed the Yubikey for One Time Password authentication, we need to provide the unique credentials to the Yubico servers. In order to the One Time Password system to work, a service using OTP to authenticate you must be able to verify that the one time string they’re being given is valid for the device giving it to them. They do this by sending it to the Yubico servers and asking if it’s valid. So, we need to provide our data to Yubico so they can verify those OTP strings. To do this, click on the “Upload to Yubico” button.
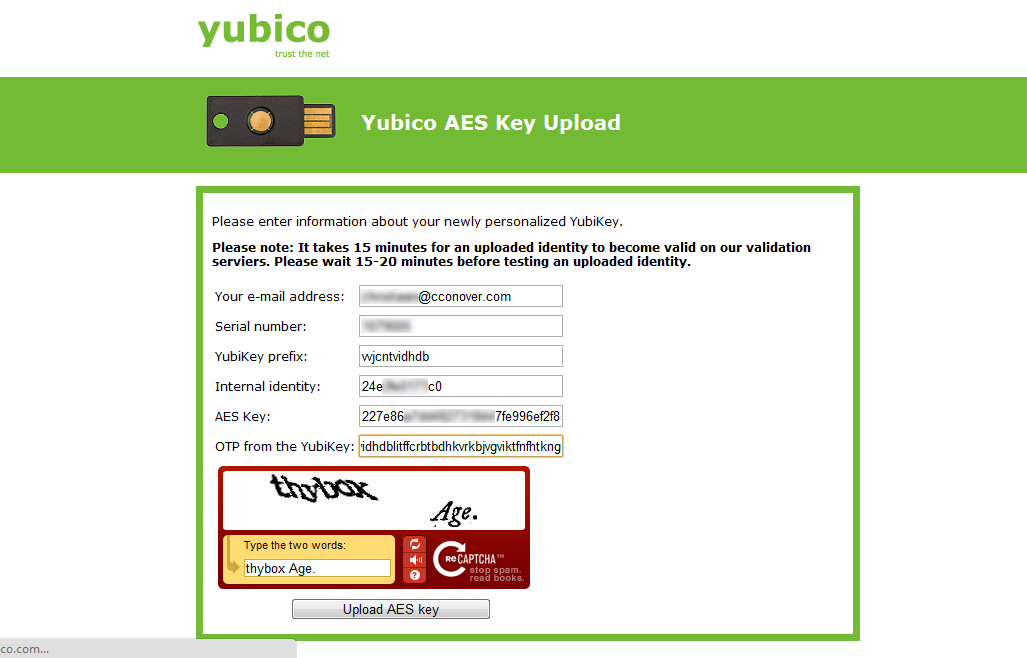
This will launch your browser and take you to a page that’s pre-filled with all the data from the Yubikey.

You’ll need to fill in any fields that weren’t provided by the configuration software, such as your email address and the CAPTCHA at the bottom. Once every field (including the CAPTCHA) except for the “OTP from the YubiKey” field is filled in, place your cursor in that remaining field and place your finger on the gold button on your Yubikey for 1-2 seconds. This will generate a one time password string, enter it into that field, and send the Enter key command to submit the form.
It may take a couple of seconds for the data to upload since the server needs to verify that all the provided data checks out. Once this is complete and the data has successfully been saved to the server, you’ll see the following page.
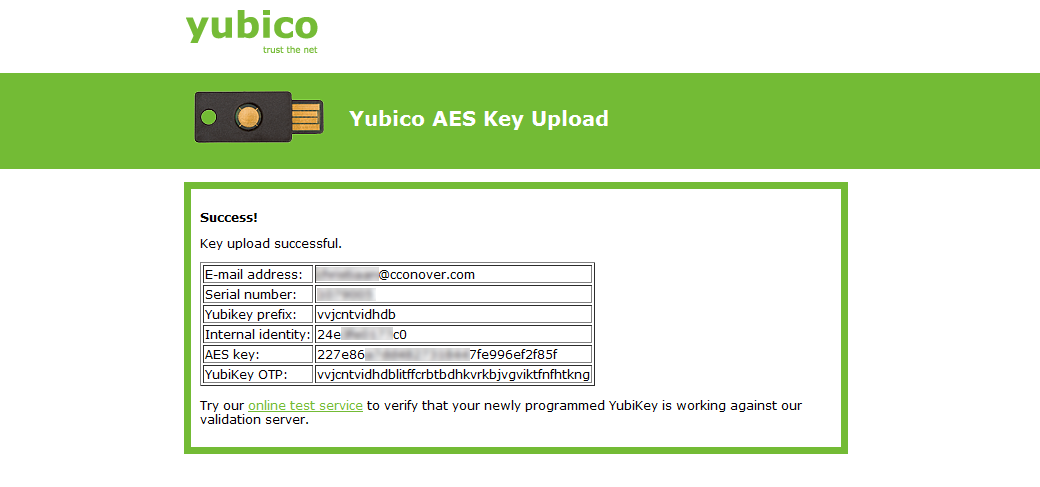
The page verifies all the data that was saved to the server, and shows the OTP string that was provided. Since each string is only valid once (hence the name “One Time Password”) that string is already invalid by the time you come to this page. It will never, ever be used again. You will want to validate that the Yubikey can successfully authenticate with the Yubico servers, so click the green link labeled “online test service” on that page, which will take you to a page with a Yubikey OTP form field.

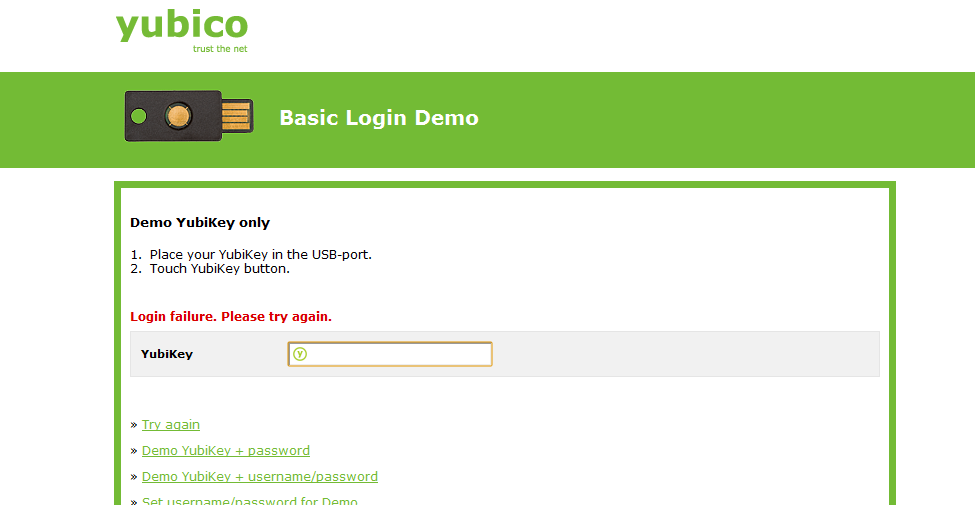
To test your Yubikey, simply place your cursor in the box and tap the button on your Yubikey for 1-2 seconds. Just like when we were uploading the credentials a moment ago, the device will generate a string of OTP and send the Enter key command.

Remember, it can take 15-20 minutes for the uploaded key to spread to all the servers, so you may not be able to test at first. If your authentication fails, you’ll see this page:
If this happens, just try again in a few minutes. Eventually you should see a page like this:
Once you see this, you’re all set with configuring your Yubikey for OTP. You can start using it with any service that supports it.
Static Password
Not all authentication systems support One Time Password. For example, Windows and Mac OS user accounts don’t support One Time Password, so you have to use a traditional static (unchanging) password. Luckily the Yubikey has a second memory slot which we can use for exactly that. This is a much simpler configuration process since it doesn’t require uploading the code to any servers.
In the Yubikey configuration software, click “Static Password” along the top, and then click the “Advanced” button.
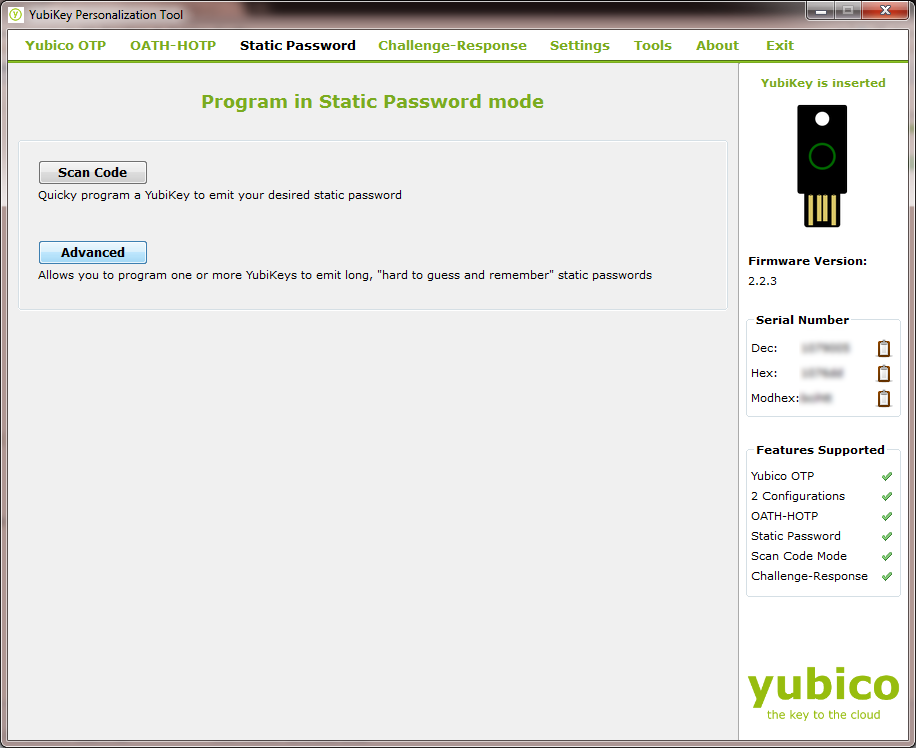
This is going to allow us go make sure all the parameters of our static password are how we want them, which I’ll walk you through. The page you’re taken to looks like this (though in this picture I’ve already set everything up):
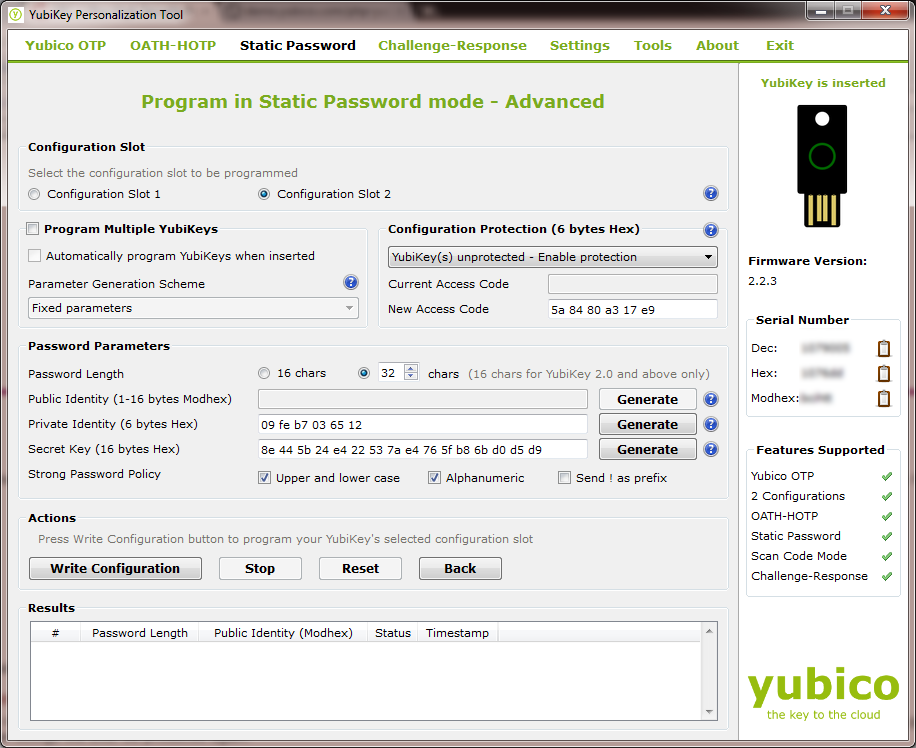
Notice the settings I’ve chosen in the image above. Starting from the top, I’ve set the Configuration Slot to Configuration Slot 2. This is crucial, as we don’t want to overwrite our OTP configuration that we just set up. In the “Program Multiple Yubikeys” section we’re going to leave this turned off, since we’re just configuring one Yubikey. I have no experience using this tool to program multiple Yubikeys at once, so I’m not going to attempt to walk you through that if that’s what you’re trying to do - we’re just going to focus on programming a single Yubikey.
In the “Configuration Protection” area, I’ve turned on protection. This is a safeguard against somebody (including you) either accidentally or intentionally erasing or overwriting your static password. This is done with a 6 byte hex code in an effort to prevent the use of insecure, easy-to-guess passwords. You can get a hex code by going to Gibson Research Corporation’s Perfect Passwords page, and copying the first 12 characters from the “64 random hexadecimal characters” field (that’s where I got the one shown above). Just paste in the field shown, and the software will automatically format it properly. You also need to store this 12 character code somewhere safe, in case you never need to reprogram your static password.
The Password Parameters section is the important part: this is how we determine what the password will be. The length defaults to 32 characters, which is fine so we won’t change that. The Public Identity field doesn’t apply to this process, so it’s grayed out. Private Identity and Secret Key are the parts that really matter, but those fields need to be generate. Simply press the “Generate” button next to each one and a random string of characters will appear in each. This string changes every time you press the “Generate” button. You’ll also want to check the boxes for “Upper and lower case” and “Alphanumeric” to make the password stronger, and to ensure compatibility with systems that support limited character sets. If you plan to have multiple Yubikeys with the same static password (keeping a backup, sharing it with your spouse, etc.) you can do so by replicating the settings in this section. Copy the Private Identity and Secret Key and make note of the length and which boxes were checked. You can then paste the strings and replicate the other settings, and the password that results will be the same. In fact, it’s smart to keep this information somewhere safe even if you only have one Yubikey in case you lose or break your Yubikey and have to create your static password on a replacement. Just be sure to keep this information somewhere secure, since somebody could replicate your password if they got their hands on it.
Once your screen looks like the one shown, click “Write Configuration” and wait for the message saying it’s been successful.
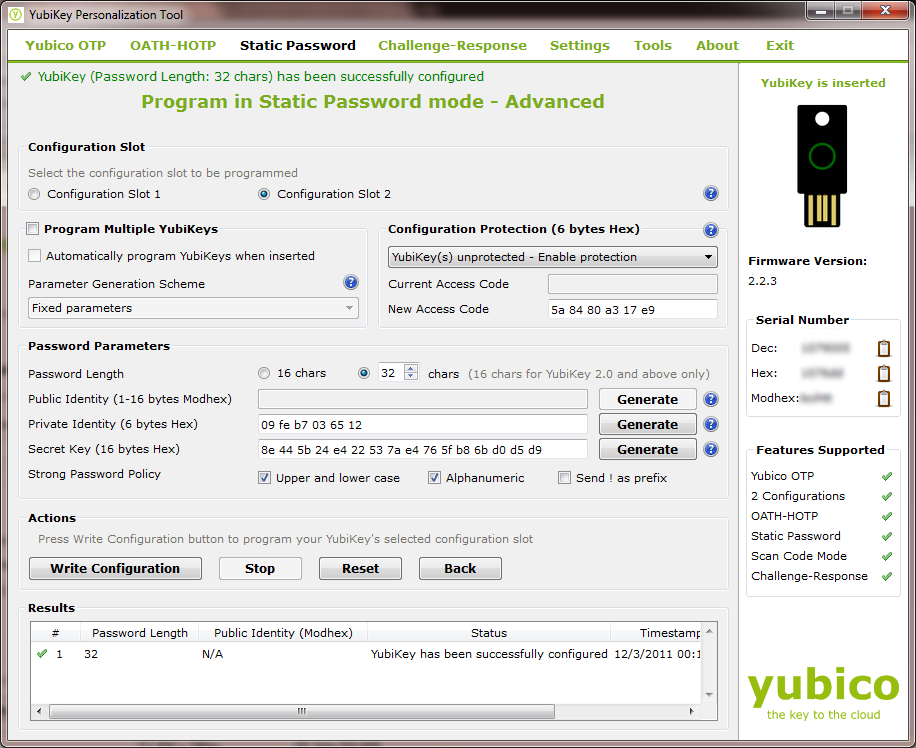
You’ll want to test it to verify that it’s working. Open a text editor such as Notepad, and hold your finger on the Yubikey button for 3-4 seconds. When you release it, the static password will be “typed” into the editor, and an Enter key command will be sent at the end.
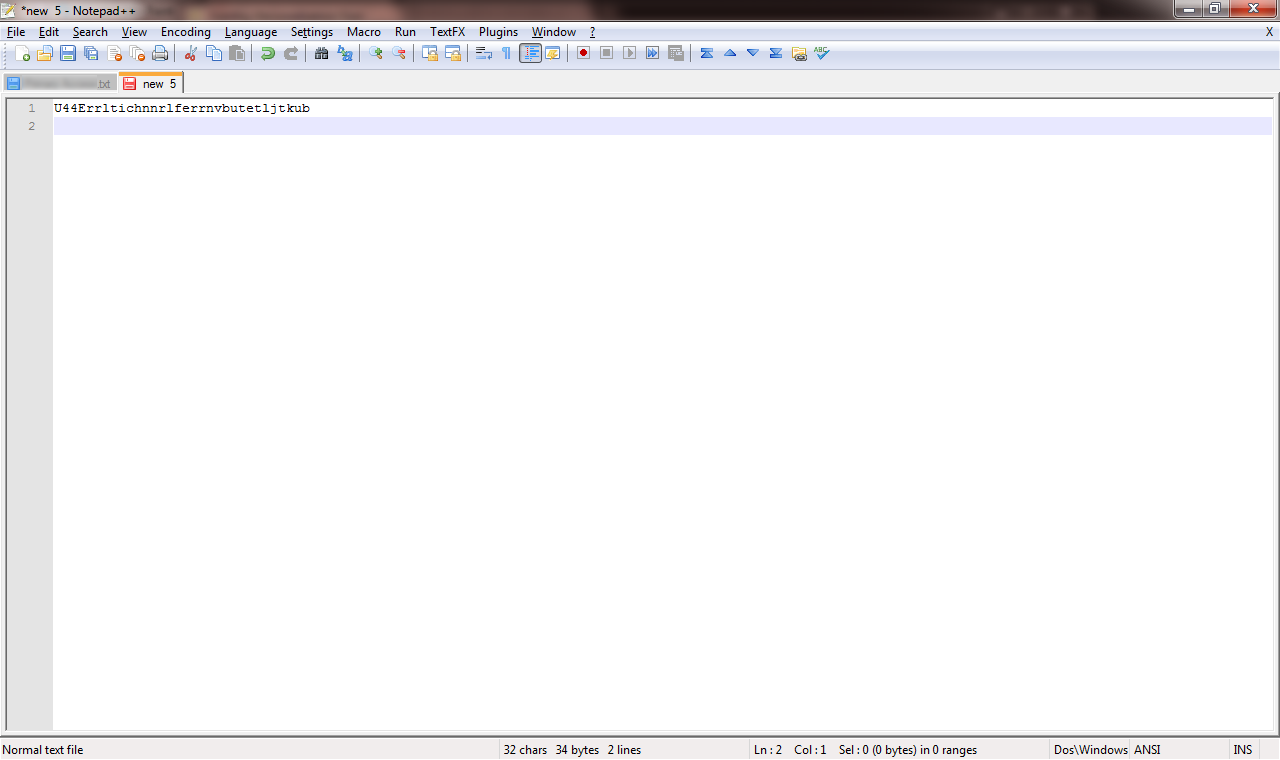
Your Yubikey is now fully configured. To use the static password, copy it from the text editor and paste it where you’re prompted to set a password. I would recommend using it in combination with a short password string that you’ve memorized. Make sure you place the memorized password ahead of the Yubikey static password, since the Yubikey presses Enter as soon as it’s put in the static password. By doing it this way, you effectively create a multi-factor authentication system in a simple password field: one part from something you know, and the other part from something you have. This makes it easy to remember your password, while still giving it superb stength by adding the 32 character random string from the Yubikey.
How To Use It
Because there are two separate configurations stored inside the Yubikey, there are two separate ways to trigger the Yubikey. Here’s how it breaks down.
- Generate OTP string: place your finger on the Yubikey button for 1-2 seconds.
- Enter static password: place your finger on the Yubikey button for 3-4 seconds. Don’t hold the button for longer than 4 seconds or else it won’t do anything. If that happens, just try it again.
With this setup you’ll be able to have top-notch authentication security in any situation. Use the One Time Password component wherever it’s supported, and use the static password combined with a memorized password everywhere else.
comments powered by Disqus